If you’ve tried setting up SAML authentication to Azure AD for both users and administrators in GoAnywhere, then you may have noticed a problem. Azure creates a new certificate for each application that you define, however, the name of the certificate never varies – it will always be called https://sts.windows.net/your_tenant_ID. This is a problem because if you create multiple login methods, the last one that you import the certificate for will overwrite the first one.
I’ll describe the full process of setting up log in methods in a moment, but in summary, to get around this you need to create the certificate outside of Azure and import it into Azure when defining a new application.
Setting up a SAML login method for GoAnywhere
Start by first defining a user template that you will use in GoAnywhere, including all the features and permissions (or web users) or roles that you need (for admins). Next, go to encryption – key management system and create a certificate in the system vault; set the common name to match your GoAnywhere URL. Export the head certificate and open the CRT file in notepad – we’ll refer to it later. Finally, export the certificate to receive a .P12 file for importing into Azure.
NOTE: If you have FIPS enabled in GoAnywhere, you will find the certificate is in .bcfks format. This is unusable in Azure, so you will either have to temporarily disable FIPS, or else generate a .P12 (or . PFX) format certificate in another system.
Now switch to Azure and select ‘Enterprise Applications’ from the services. Click on ‘+ New Application’, then on ‘+ Create your own application’ and give the application a name (in my example, i named my app gademowu). This takes a few seconds for Azure to create the application.
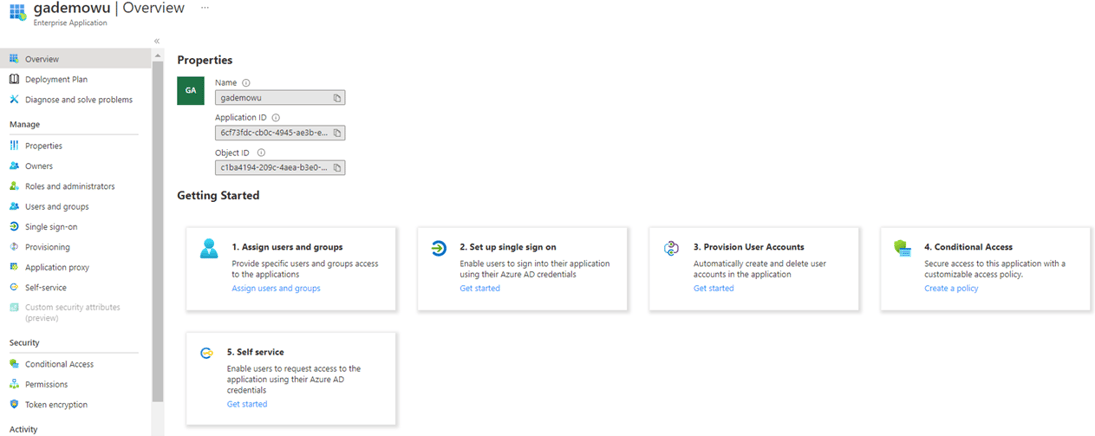
Go straight to ‘2. Set up a single sign-on’, then click on SAML. Before Anything else, go straight to ‘SAML Certificates’ and click Edit.
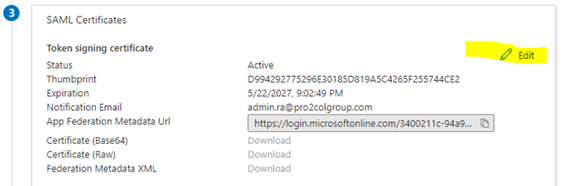
Click on ‘Import Certificate’ and browse to the .p12 certificate that you created in GoAnywhere. Enter the certificate password and click add. You’ll see that you now have two certificates, one active and the other inactive. Set the inactive certificate to be active using the ‘…’ option, and ignore any warning message that appears (the original certificate will disappear, this is normal)
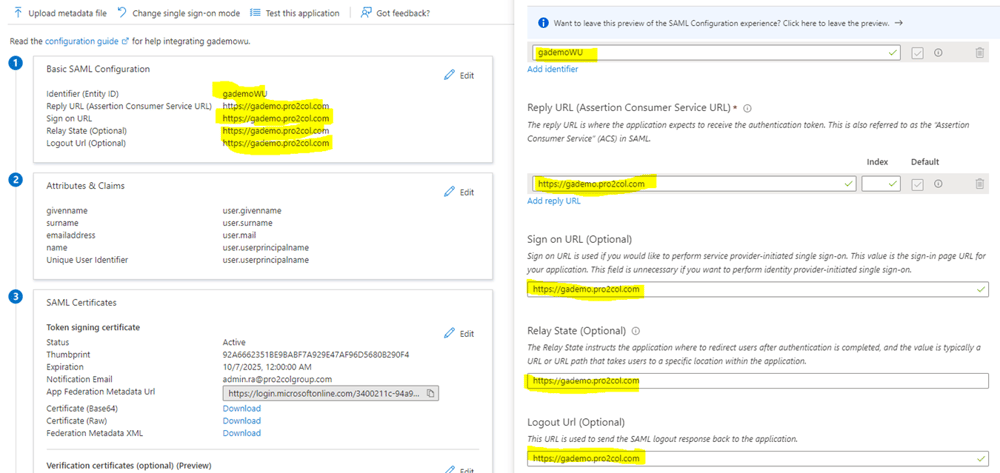
Next, click on edit next to Basic SAML Configuration.
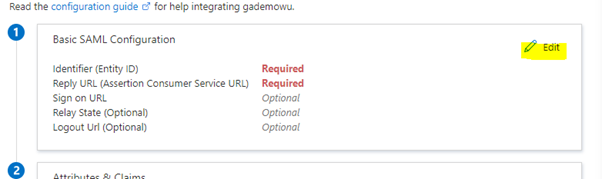
Add an identifier, I used gademoWU again (this needs to be unique in your tenant). For the Reply, Sign on, Relay State and Logout URLs, I just used https://gademo.pro2col.com for everything. Finally, hit save.
You will need to grant some access to the new application, click on ‘users and groups' on the far right, then click ‘+ Add user/group’. Search for and select the users and groups that you need.
Finally, go back to the ‘Single Sign-on option on the left. Scroll to the end of the SAML Certificates section and click Download to get the Federation Metadata XML. Save this file to your machine and open it in notepad.
Look for the tag <X509Certificate> (it occurs four times, anyone will do). You need to compare the content (ignoring formatting) of this tag to the.CRT file (head certificate) that you exported from GoAnywhere – if it doesn’t match then you’ll need to go back to the start of creating the enterprise application again.
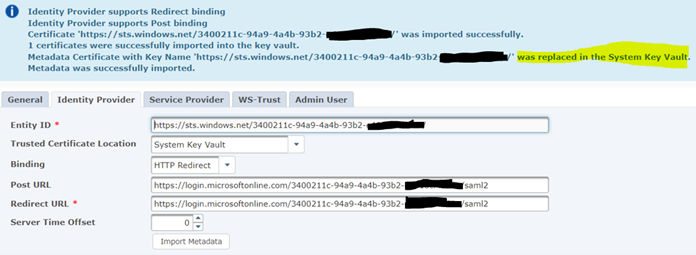
If it matched, you can now set up the login method in GoAnywhere. Go to ‘Users – Login Methods’ and create a new SAML login method for web users. Provide a name for the method and set the logout URL to be the same as your web client (in my case, https://gademo.pro2col.com). Click on the ‘Identity Provider’ tab and import the federation metadata XML file that you just downloaded from Azure. Select ‘Replace Certificate if exists’.
Now click on the Service Provider tab.

Enter the Entity ID that you specified in Azure and select your server certificate for the private key name (this can be the certificate that you created if you want).
Turn off ‘Force Authentication’ to allow non-AD users to enter creds and set Authentication Comparison to Exact.
Enter your URL as the SSO site URL then go to the Web User tab.
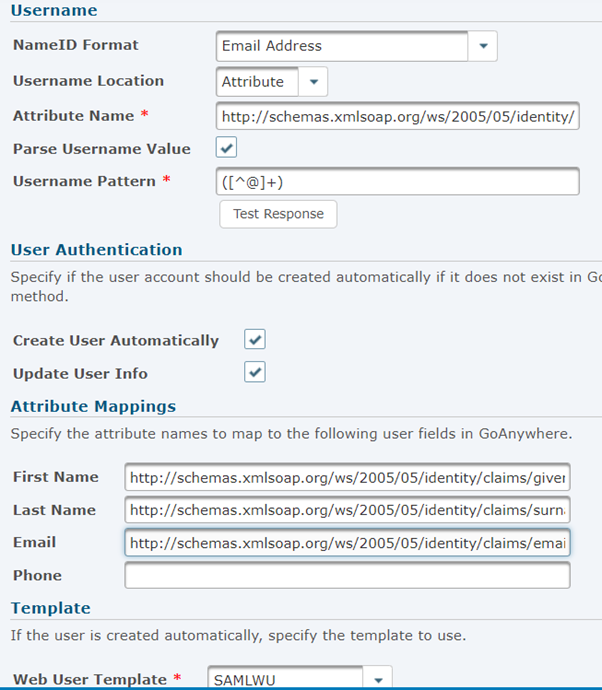
Complete the fields as shown:
NameID Format Email Address
Username Location Attribute
Attribute Name* http://schemas.xmlsoap.org/ws/2005/05/identity/claims/name
Parse Username Value Yes
Username Pattern* ([^@]+)
Create User Automatically Yes
Update User Info Yes
Attribute Mappings
First Name http://schemas.xmlsoap.org/ws/2005/05/identity/claims/givenname
Last Name http://schemas.xmlsoap.org/ws/2005/05/identity/claims/surname
Email http://schemas.xmlsoap.org/ws/2005/05/identity/claims/emailaddress
Web User Template The template that you created at the start
Finally, Hit Save.
Edit the HTTPS Service and go to listener: default.
Set SAML Single Sign-On to be SAMLWU, then save and restart the service.
Go to user - Login Settings and click on the login routing tab.
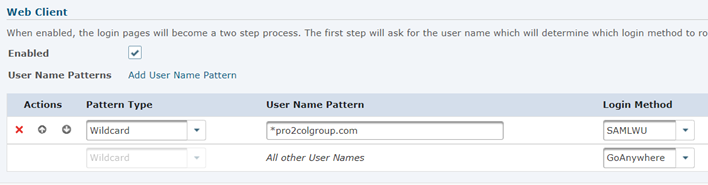
Add a new pattern to the web client rules, directed to the SAMLWU login method.
Click save, then test with a web user that you granted access to in Azure.
Assuming that there are no errors, you can now repeat the process for admin users, EXCEPT for the creation and export of certificates – you will import the same certificate for admins into Azure as you did for web users.
As long as the Federation Metadata for the admin user contains the same certificate in the <X509Certificate> tag as the WebUser XML, you can import it into a new login method and safely overwrite the metadata certificate.
If you would like to know more about how to set up Azure Active Directory for SAML, our GoAnywhere experts can assist you. Please get in contact with your dedicated Account Manager or contact us here.