In this top tip, one of our GoAnywhere experts, Sam Fry, demonstrates the process of setting up the SharePoint cloud connector to upload files to SharePoint Online.
What are cloud connectors?
One of the things that sets GoAnywhere apart from the competition is its wide range of cloud connectors which can be utilised within projects to meet your automated workflow needs. Cloud connectors utilise REST API to make these connections. This is why they offer such expansive interaction capabilities with cloud services.
Not only do cloud connectors enable file transfers to cloud storage solutions such as S3, Blob and SharePoint, they also provide the ability to integrate with other application types, including both cloud and on-premise solutions.
How to use cloud connectors:
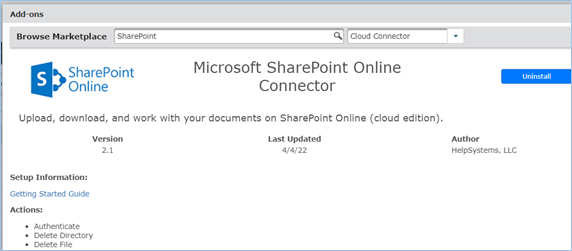
To start with, you’ll need to go to system > add-ons > browse marketplace within the GoAnywhere admin portal.
From here you can search for a trial of the desired cloud connector and install it, as well as viewing the other connectors that are available in the market. Once you’ve selected the connector you want, it will give you the options to install a trial, view the available actions, and download a guide to help you get started.
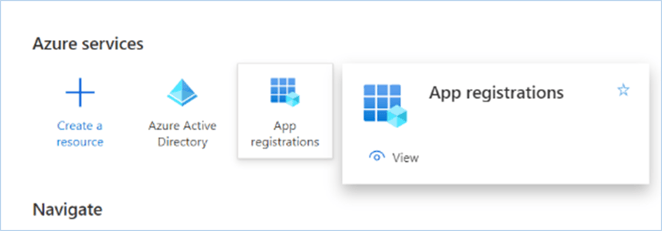
Once installed, you need to set up an Application Registration in https://portal.azure.com/
First, select App Registrations
Then select New Registration, enter a name and select the applicable option for use of this application in your organisation.
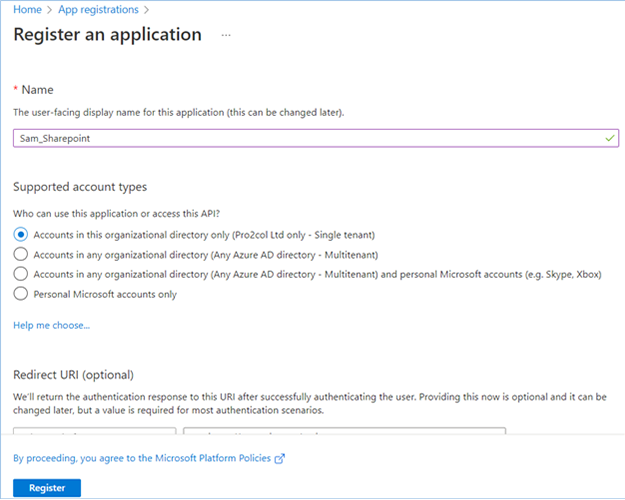
Select Register
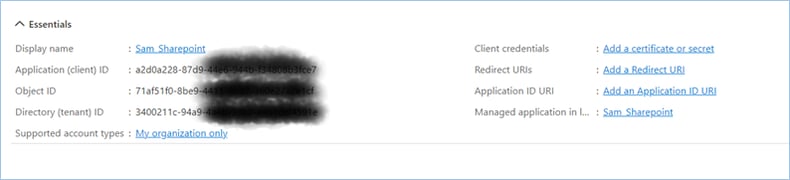
The Application (Client) ID and Tenant ID fort the new application will be displayed on screen. Copy these for use in the SharePoint Cloud Connector resource later.
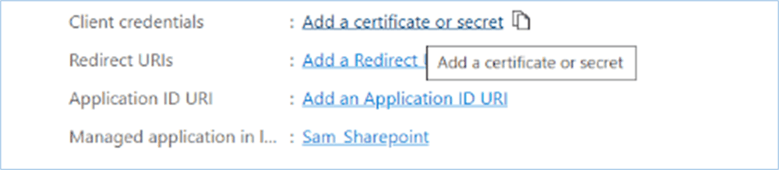
Then select Add a certificate or secret from the top right-most screen option.
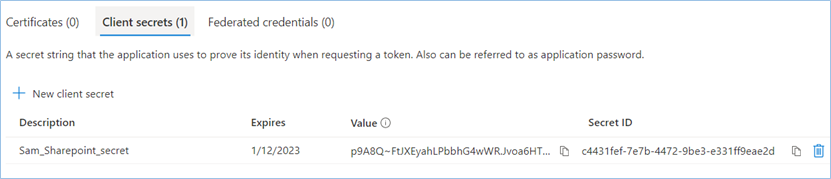
Select New client secret.
Give the secret a name and select Add.
The secret will initially be displayed on the screen in the Value field (not the Secret ID field).
Copy the contents of the Value field to where you have copied the App (Client) Id and tenant ID for use in setting up the GoAnywhere SharePoint Connector. You may also need the display name later if you wish to restrict the sites permissioned for this resource. See the section Select Sites only.
Once you leave this screen, the Value will be hidden so copying it now is essential.
Go to API permissions on the left menu.
Select Add a Permission.
Select Microsoft Graph from the APIs list.
Select Application permissions.
Scroll to Sites in the list or search for Sites.
Select Sites.ReadWrite.All.
Select Add permissions.
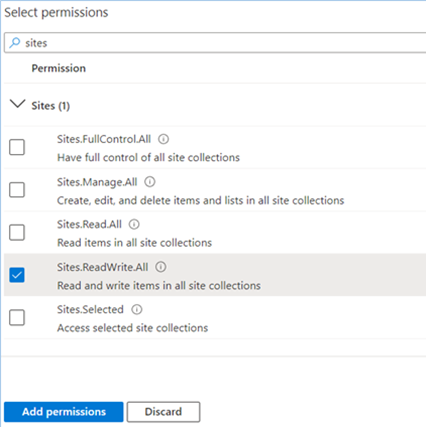
Sites.ReadWrite.All is the default setting in all documentation for setting up a SharePoint connector.
Initially the permission is not granted.
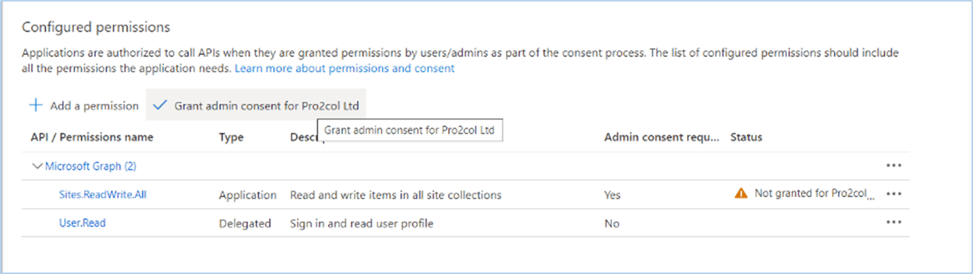
Select Grant admin consent for [your organisation].
An Azure global administration account is required to grant these permissions, and the Connector will not work without permissions being explicitly granted here.

Selected Sites Only
If your organisation does not want to open all sites to the SharePoint Connector there is a way to permission selected sites only.
There is a PowerShell add-on named PnP which can be used to create specific site permissions in conjunction with the use of the option Sites.Selected in the Azure API permissions section above. The result is restricted application access to a specific SharePoint site or set of sites.
To configure selected sites:
Open PowerShell
Type the following command
Install-Module -Name PnP.PowerShell
Then run the following command altered to reflect your tenantname and site name
Connect-PnPOnline https://tenantname.sharepoint.com/sites/siteName -Interactive
On connect, a pop-up window will appear asking for the SharePoint site owner credentials to validate the connection.
Enter the credentials and, on successful connection to the PnP module, amend the final command to grant permissions to the required site:
Grant-PnPAzureADAppSitePermission -AppId 'AzureAppIdwithSitesdotselectedpermission' -DisplayName 'App Name here' -Site 'https://tenantname.sharepoint.com/sites/sitename' -Permissions Write
- Replace the Appid string in quotes with the relevant App ID (Client id) (in quotes).
- Replace the display name in quotes with the display name you gave the Application in Azure (in quotes)
- Replace the site https path with the path used in PnP step 2 to connect (in quotes)
- If successful the Id, Roles and Apps will be returned to the screen
- Repeat the grant step for any additional Sites that your Application id should permission
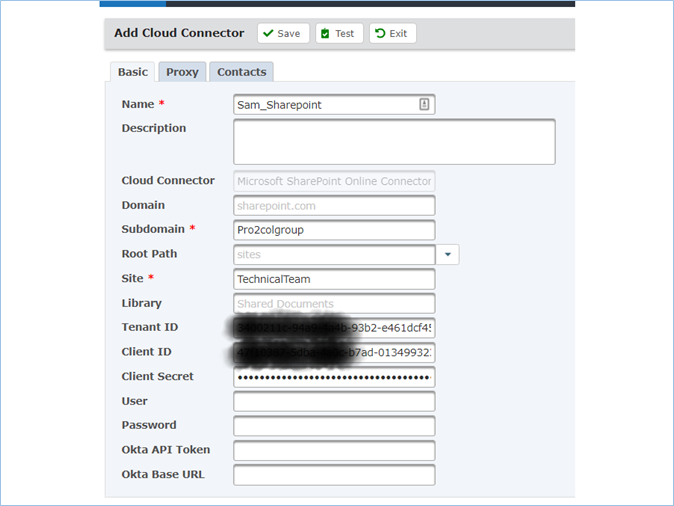
Now you are ready to configure the Cloud Connector in GoAnywhere.
Configuring the SharePoint cloud connector
Subdomain: Enter your SharePoint subdomain. The subdomain is the text in your SharePoint path immediately preceding the text.sharepoint.com.
Site: enter a valid SharePoint site.
Enter the saved Tenant ID, Client ID (Application ID) and the Client Secret value copied earlier.
Usernames and passwords are being depreciated and are not required for this connector.
Select the Test button to test the connection to the resource.
If successful, you will see a success message displayed.
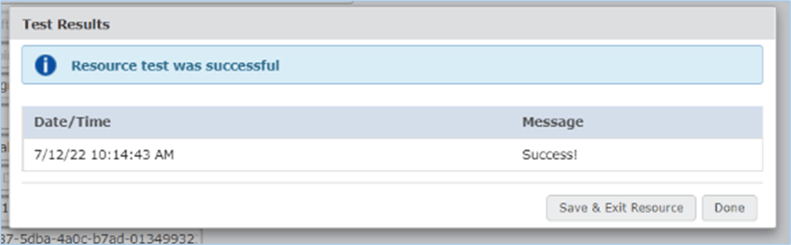
Select Save & Exit Resource.
Creating a project
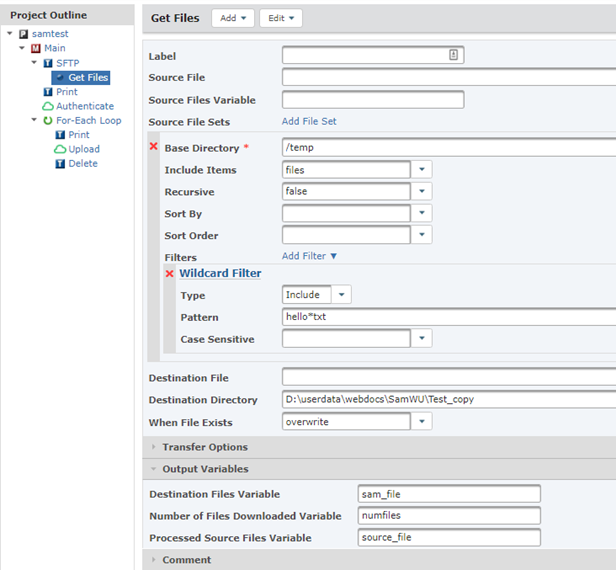
Once you’ve got a working connection, you’ll need to create a project to utilise the cloud connector. Get the files from your source, use the Authenticate task to authenticate to your cloud connector and then and process to SharePoint.
I am demonstrating an upload from SFTP to SharePoint, but equally there is a download function to transfer the other way as well as list files, delete file, move file, rename file, rename or make directory, as well as collect item metadata commands available to the cloud connector.
Simple Upload Project Overview
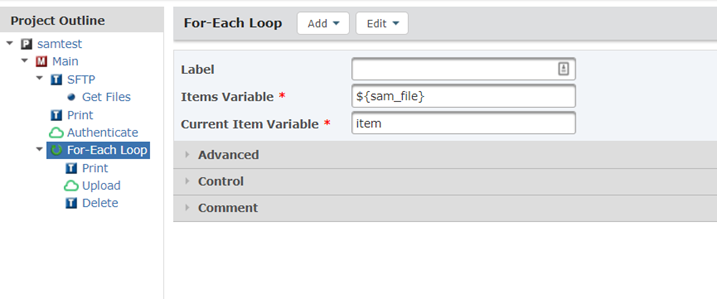
This simple project collects some criteria matching named files from the SFTP server, saves them to a temporary location on the GA server, authenticates with the SharePoint connector and then loops through the file set to upload the files to a SharePoint site and folder you specify.
Some Servers may not let you copy a file directly from the server to SharePoint so files may need to be saved into a temporary project workspace or other directory on the Local GA server first as shown below.
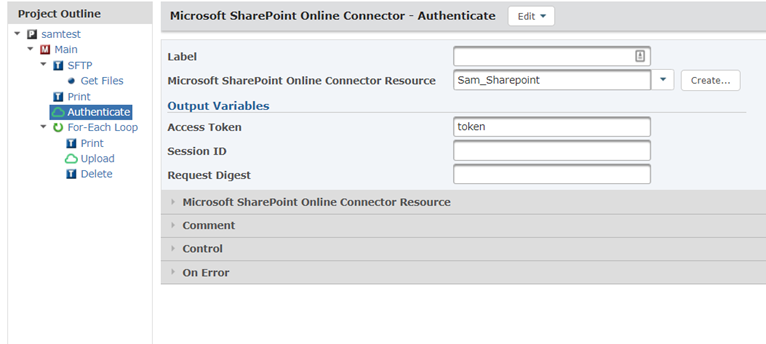
Authenticate by selecting the resource name and adding an access token (any text).
This example project then loops through the file set and prints the name of each file to the job log (for record) and then uploads each file to the nominated SharePoint folder/directory.
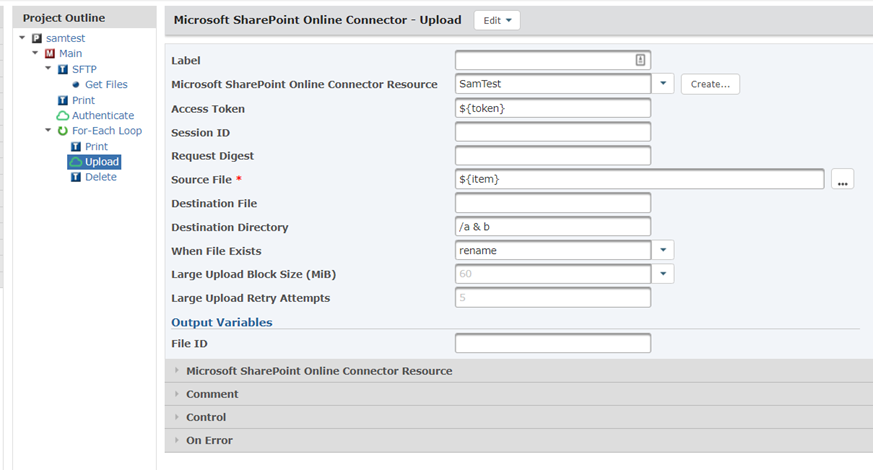
Example of the upload to SharePoint command running within a loop. The token variable declared earlier during the authenticate step is used here.
Be aware that there is no option to overwrite the file in SharePoint on upload so a separate delete command may need to be run to prevent multiple copies of files being stored if the file already exists.
The final step in this project is to delete the files from the temporary storage area on the GoAnywhere server after they have been successfully uploaded to SharePoint.