In this top tip, GoAnywhere expert, Richard Auger demonstrates the process of creating your own reports.
In GoAnywhere MFT you can of course licence the ‘Advanced Reporting’ module which gives you access to a range of out-of-the-box reports that you can use to see what’s been happening inside GoAnywhere. You may however wish to create a report that provides more information and execute this on a regular basis, or even to generate an Excel report if you don’t have the advanced reporting licenced. This is actually quite a simple thing to achieve and only really takes a few minutes. Please note that this is only possible for regular GoAnywhere installations, not for the SaaS version. These are the steps that you will need to go through:
1) Create a database resource to access your own database
If you’ve not already done this, you’ll need to create a resource. You can get the details to put into the resource by clicking on System, then Database Configuration. From here, you can get the JDBC URL that you will use to connect to the database (You will of course need credentials). Then simply create a new database resource:
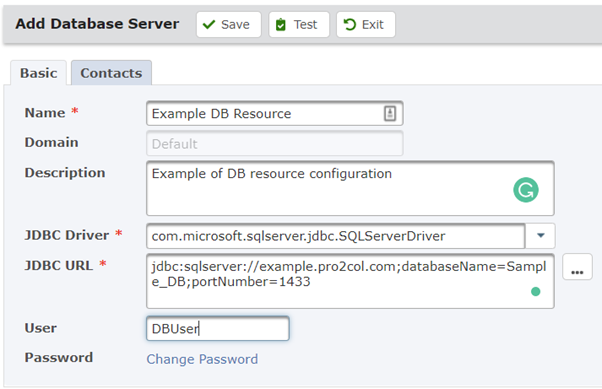
NOTE: DO NOT UPDATE THE DATABASE IN ANY PROJECT THAT YOU RUN UNLESS YOU HAVE BEEN GIVEN EXPLICIT INSTRUCTIONS TO DO SO
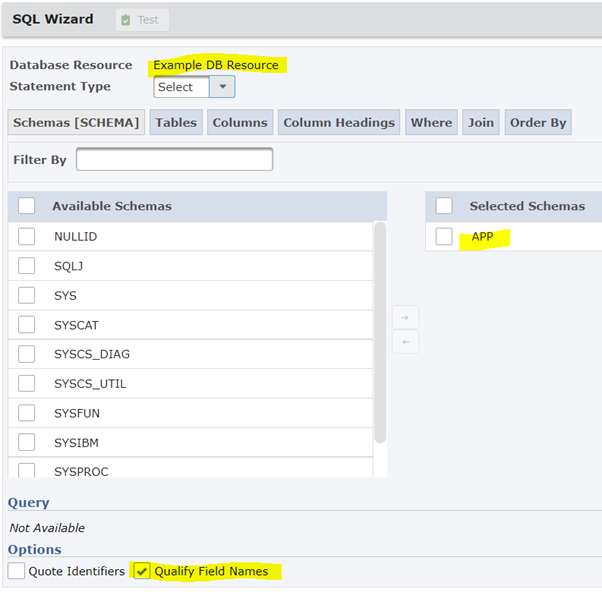
2) Launch the SQL Wizard
The SQL Wizard can be found under the Tools option of the System menu. Select your database resource and click Connect. You will now need to select the ‘App’ Schema on the left of the screen and use the arrow to move it to the right. Finally click ‘Qualify Field Names’ if you intend to create a join query.
Move through the tabs on the screen (Tables, Columns etc.) to select and build your query as applicable. If you want a joined table (for example to include both job and file information in the same report) then use the JOIN tab to set this.
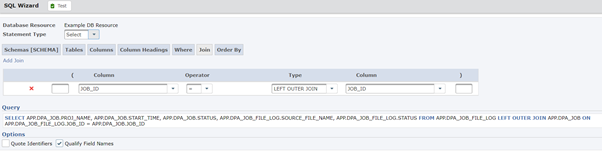
You can use the test button to validate that the query brings back the result set that you want.
Once you are happy with the results, copy the query into a text editor and create a new project to execute it.
3) DB Query Project
The project only really needs to execute the SQL statement, then process the returned data. This data comes back as a rowset variable which you can feed into a csv, excel, custom report (pdf) etc.
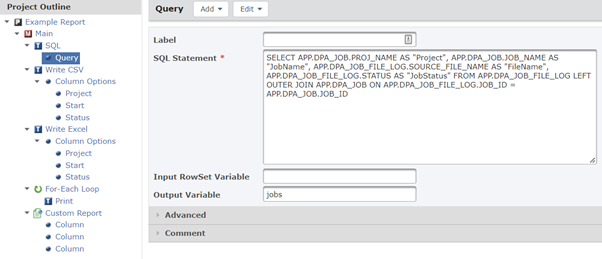
In my case, it does all three, as well as looping through the result set to build an HTML table using the print statement. You could even write into a different database if required. You should add output columns to match each column produced by the SQL statement, however as you can see from the example, you don’t have to use all of the columns.