The GoAnywhere administrator console obviously allows administrators to create and manage users etc., however, sometimes it is preferable to automate these activities using either external scripting or a workflow. GoAnywhere has a REST API which allows integration and automation and is useful if you are adept at scripting or programming; this is also available as a standalone product called GACMD. There is an alternative if you would prefer to keep things inside of GoAnywhere itself, though – the GoAnywhere command connector.
Access the free cloud connector
You can access this as a free cloud connector (click system – Add-ons – Marketplace – install). You can also access the help documentation from the same place, or directly at https://static.helpsystems.com/goanywhere/pdfs/connector-guides/GoAnywhere_Command_Connector_20200116.pdf
Once you have installed the connector, the first thing to do is create a resource (Resources – Cloud Connectors – Add Cloud Connector)
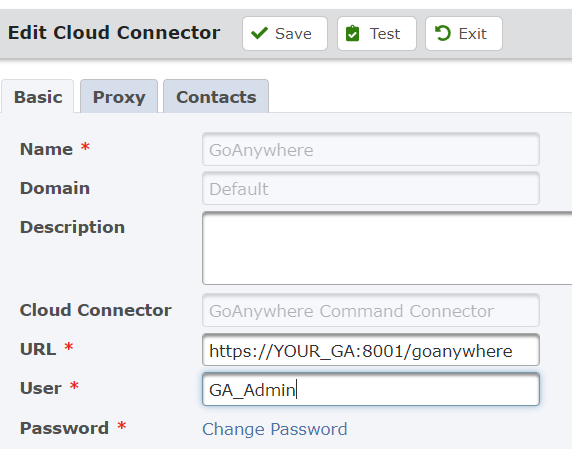
Enter your GoAnywhere URL as shown in this image and provide some administrator credentials – I recommend that you create a dedicated account for this rather than using your own admin account. Test the connection and save the resource. You can then proceed to create a workflow using the connector.
Setting up the project to get user information
The first workflow that we can try is to get user information. This is a good test as it is non-intrusive – effectively all we need to do is export information and then parse it. This is how I’ve set the project up:
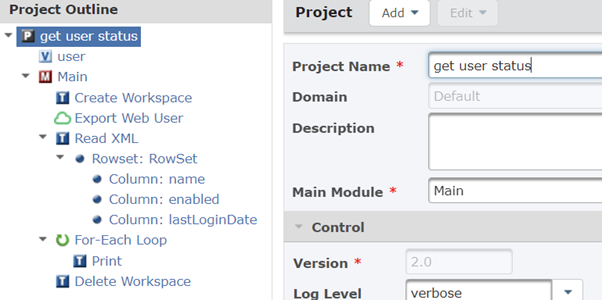
The cloud connector is going to return the results of any query operation in XML format – this means that after I have retrieved the information, I simply have to check the XML.
For my cloud connector task, I have defined this:
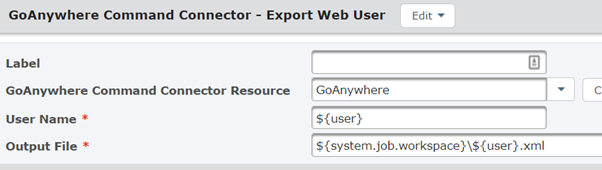
So effectively I pass the user name that I want to check as a variable, and drop the results into a file with the same name. The XML itself is filled with all available information on the user (my XML for my test account is 170 lines long!). You’ll need to find the correct nodes that you want in the output, and add them into the read XML rowset, for example:
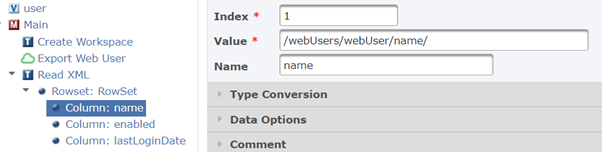
Relates to this field in the XML:
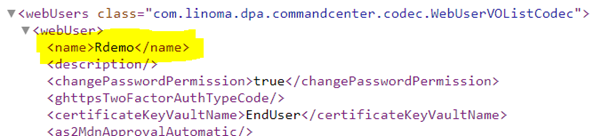
Finally, you can use the information you have retrieved in either a print or as input to another command.
Command connector for additional workflows
After you have a simple workflow working correctly, it’s easy to see what’s needed to use the command connector for other purposes. Good examples of things to try are:
- Update Web User – use this to enable or disable accounts
- Run Project/Job – process some decision making logic before executing another workflow
- Adding Web Users – useful for batch creation of multiple users listed in a file
There are of course many other occasions when the GA Command Connector can be used; as part of a ‘transfer into production’ process, you can use an ‘export project’, manipulate the resulting xml as necessary, then ‘import project’ into another environment. A big bonus is that you can export monitors – this function is not available from the GUI and relies on you accessing the monitors folder in the back end system.
Finally, before using any of the ‘import’ functions, be sure to familiarise yourself with the format of the xml by reviewing the results of an export.